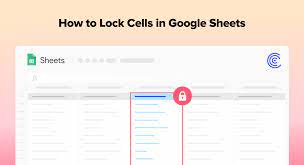
Are you looking to secure your data in Google Sheets? Look no further! In this article, we will show you how to effortlessly lock cells in Google Sheets, ensuring the utmost data security. With cell protection, you can prevent accidental edits or unauthorized access to your important information.
Whether you’re a beginner or an advanced user, our step-by-step guide will walk you through the process of locking cells in Google Sheets. We’ll also explore advanced techniques for enhanced data security, such as customizing cell permissions.
Worried about troubleshooting common issues? We’ve got you covered! Our article includes tips to overcome any challenges you may encounter while locking cells in Google Sheets.
Lastly, we’ll share best practices to help you maintain data integrity, ensuring your information remains safe and secure. So, let’s dive in and learn how to lock cells in Google Sheets effortlessly!
Key Takeaways
- Cell protection in Google Sheets provides data security by preventing accidental edits or unauthorized access.
- Users can control who can make changes to specific cells or ranges, making it useful for sharing spreadsheets and collaborating on projects.
- Data validation and conditional formatting can be used to enhance data security in Google Sheets.
- Password protection for the entire spreadsheet and customized cell permissions for different users are available options for securing data in Google Sheets.
Understanding Cell Protection in Google Sheets
To fully grasp the concept of cell protection in Google Sheets, you’ll need to understand how it can safeguard your valuable data from accidental modifications or unauthorized access.
When you lock cells in Google Sheets, you prevent anyone from editing or deleting the protected cells, ensuring the integrity and security of your data. Cell protection allows you to control who can make changes to specific cells or ranges, giving you complete control over the level of access others have to your spreadsheet.
This feature is particularly useful when you’re sharing spreadsheets with teammates or collaborating on a project, as it ensures that only authorized individuals can modify certain cells while leaving others open for editing.
By utilizing cell protection in Google Sheets, you can effortlessly secure your data and prevent any unwanted changes.
Step-by-Step Guide to Locking Cells in Google Sheets
Start by opening up the spreadsheet where you want to protect specific information from being edited by others. In Google Sheets, you can easily lock cells to prevent them from being modified. Here’s a step-by-step guide to help you through the process.
First, select the cells that you want to lock. Then, right-click and choose ‘Protect range’ from the options. A sidebar will appear where you can customize the protection settings. You can choose to allow certain users to edit the range or set it as view-only. You can also add a description and a warning message.
Once you’re done customizing, click on the ‘Set permissions’ button to apply the cell protection.
Advanced Techniques for Data Security in Google Sheets
Enhance the security of your data in Google Sheets with advanced techniques that go beyond simply locking cells.
One powerful technique is using data validation to restrict the type and range of data that can be entered into a cell. This prevents accidental or malicious changes to your data.
Additionally, you can use conditional formatting to highlight any unauthorized changes made to your spreadsheet. By setting up notifications for changes, you’ll receive an email whenever someone edits your sheet, allowing you to monitor and control access to your data.
Finally, you can protect your entire spreadsheet with a password, ensuring that only authorized individuals can open and modify it.
Implementing these advanced techniques will provide you with an extra layer of security for your valuable data.
Customizing Cell Permissions in Google Sheets
One way to customize cell permissions in Google Sheets is by assigning different levels of access to specific users, allowing them to view or edit only certain cells within the spreadsheet. This feature is particularly useful when you want to share your spreadsheet with multiple collaborators but still maintain control over who can see and modify certain data.
To customize cell permissions, you can follow these steps:nn1. Open your Google Sheets spreadsheet.nn2. Select the cells you want to customize permissions for.nn3. Click on the ‘Data’ tab and choose ‘Protect sheets and ranges’.nn4. Select the users or groups you want to customize permissions for, and choose the specific access level for each.
By customizing cell permissions, you can ensure that your data remains secure while collaborating with others.
Troubleshooting Common Issues with Cell Locking in Google Sheets
Having trouble with cell locking in Google Sheets? Let’s dive into troubleshooting common issues to ensure a smooth experience.
First, make sure you have the necessary permissions to lock cells. Only users with edit access can lock or unlock cells. If you’re unable to lock cells, check if you’re signed in with the correct Google account or if you’ve been granted the required access.
Another common issue is accidentally locking the entire sheet instead of specific cells. Double-check the selected range and make sure that only the intended cells are locked.
Lastly, if you encounter issues with locked cells not being protected, verify that the sheet isn’t protected by another user or by a protected range.
Following these troubleshooting steps should help resolve any cell locking issues in Google Sheets.
Best Practices for Maintaining Data Integrity in Google Sheets
To ensure your data remains accurate and reliable, it’s important to follow these best practices when working with Google Sheets.
First, always double-check your formulas before applying cell locking. Mistakes in formulas can lead to incorrect data calculations, so it’s crucial to review and test them thoroughly.
Additionally, avoid deleting or rearranging locked cells without proper consideration. Doing so may disrupt the integrity of your data and cause errors in your calculations.
Furthermore, make sure to regularly update and review your data validation rules. This will help prevent any invalid or incorrect data from being entered into your spreadsheet.
Lastly, consider using protected sheets or ranges to further safeguard your data.
By following these best practices, you can maintain the integrity of your data and ensure its accuracy.
Frequently Asked Questions
Yes, you can lock individual cells within a protected range in Google Sheets. This allows you to control access to specific data while keeping the rest of the sheet editable.
Yes, you can password protect a specific cell or range in Google Sheets. This ensures that only authorized users can access or edit the protected data, providing an extra layer of security for your information.
To prevent accidental editing of locked cells in Google Sheets, you can protect the sheet. Go to the “Data” tab and select “Protect sheets and ranges.” Choose the cells you want to lock and set the permissions for editing.
Yes, you can allow specific users to edit certain cells while keeping others locked in Google Sheets. This allows for collaboration while ensuring the security of your data.
If you accidentally delete a locked cell in Google Sheets, you won’t be able to recover the data unless you have a backup. Make sure to double-check before deleting any locked cells to avoid losing important information.
Conclusion
So there you have it – a comprehensive guide on how to lock cells in Google Sheets to ensure the security of your data effortlessly.
By following the step-by-step instructions and exploring advanced techniques for data security, you can customize cell permissions and troubleshoot common issues.
Remember to adhere to best practices for maintaining data integrity to ensure the smooth functioning of your Google Sheets.
With these tips, you can confidently protect your valuable data and keep it safe from unwanted changes or access.